Banana Pi Format Emmc
The Compute Module has an on-board eMMC device connected to the primary SD card interface. This guide explains how to write data to the eMMC storage using a Compute Module IO board.
Please also read the section on the Compute Module Datasheet.
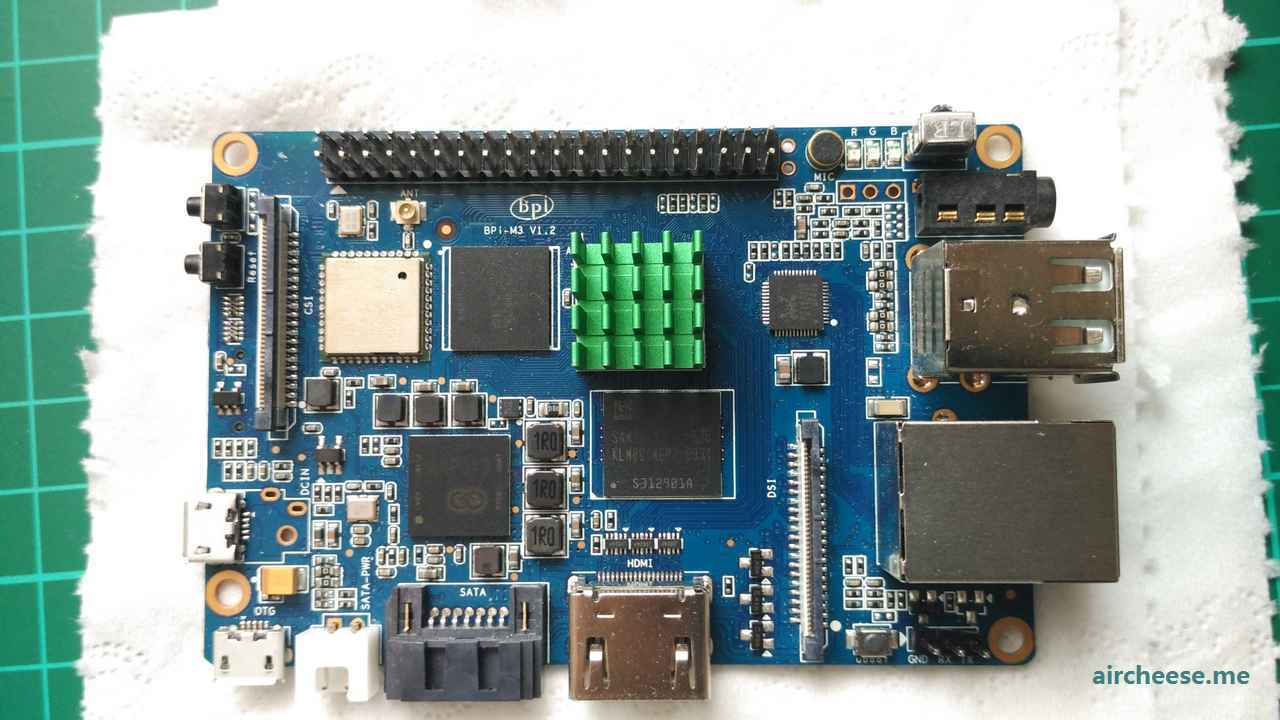
Prepare your SD card for the Banana Pi. In order to enjoy your Banana Pi, you will need to install an Operating System (OS ) onto an SD card or eMMC Flash. Instructions below will teach you how to write an OS image to your SD card or eMMC Flash under Windows and Linux. 1.Insert your SD card into your computer. The Banana Pi M64 comes with 8 GB of eMMC which is the main feature that differentiates it from the Raspberry Pi 4. It also features a 4K HDMI interface, MIPI-DSI, and MIPI-CSI, as well as onboard wireless and Gigabit Ethernet for your connectivity needs.
Steps to flash the eMMC on a Compute Module
To flash the Compute Module eMMC, you either need a Linux system (a Raspberry Pi is recommended, or Ubuntu on a PC) or a Windows system (Windows 7 is recommended). For BCM2837 (CM3), a bug which affected the Mac has been fixed, so this will also work.
Note There is a bug in the BCM2835 (CM1) bootloader which returns a slightly incorrect USB packet to the host. Most USB hosts seem to ignore this benign bug and work fine; we do, however, see some USB ports that don't work due to this bug. We don't quite understand why some ports fail, as it doesn't seem to be correlated with whether they are USB2 or USB3 (we have seen both types working), but it's likely to be specific to the host controller and driver. This bug has been fixed in BCM2837.
For Windows users
Under Windows, an installer is available to install the required drivers and boot tool automatically. Alternatively, a user can compile and run it using Cygwin and/or install the drivers manually.
Windows installer
For those who just want to enable the Compute Module eMMC as a mass storage device under Windows, the stand-alone installer is the recommended option. This installer has been tested on Windows 10 32-bit and 64-bit, and Windows XP 32-bit.
Please ensure you are not writing to any USB devices whilst the installer is running.
- Download and run the Windows installer to install the drivers and boot tool.
- Plug your host PC USB into the CMIO USB SLAVE port, making sure J4 is set to the EN position.
- Apply power to the CMIO board; Windows should now find the hardware and install the driver.
- Once the driver installation is complete, run the
RPiBoot.exetool that was previously installed. - After a few seconds, the Compute Module eMMC will pop up under Windows as a disk (USB mass storage device).
Setting up the Compute Module IO board
Ensure the Compute Module itself is correctly installed on the IO board. It should lie parallel with the board, with the engagement clips clicked into place.
Make sure that J4 (USB SLAVE BOOT ENABLE) is set to the 'EN' position.
Use a micro USB cable to connect the IO board to the host device.
Do not power up yet.
Building rpiboot on your host system (Cygwin/Linux)
We will be using Git to get the rpiboot source code, so ensure Git is installed. In Cygwin, use the Cygwin installer. On a Pi or other Debian-based Linux machine, use the following command:
IntroductionCorsair HX1000W is a 1,000 W power supply with six 6/8-pin auxiliary cables for video cards (four on the modular cabling system and two coming directly from inside the unit), modular cabling system, solid aluminum capacitors, dual-transformer design and with the manufacturer saying that it can really deliver 1,000 W at 50° C. 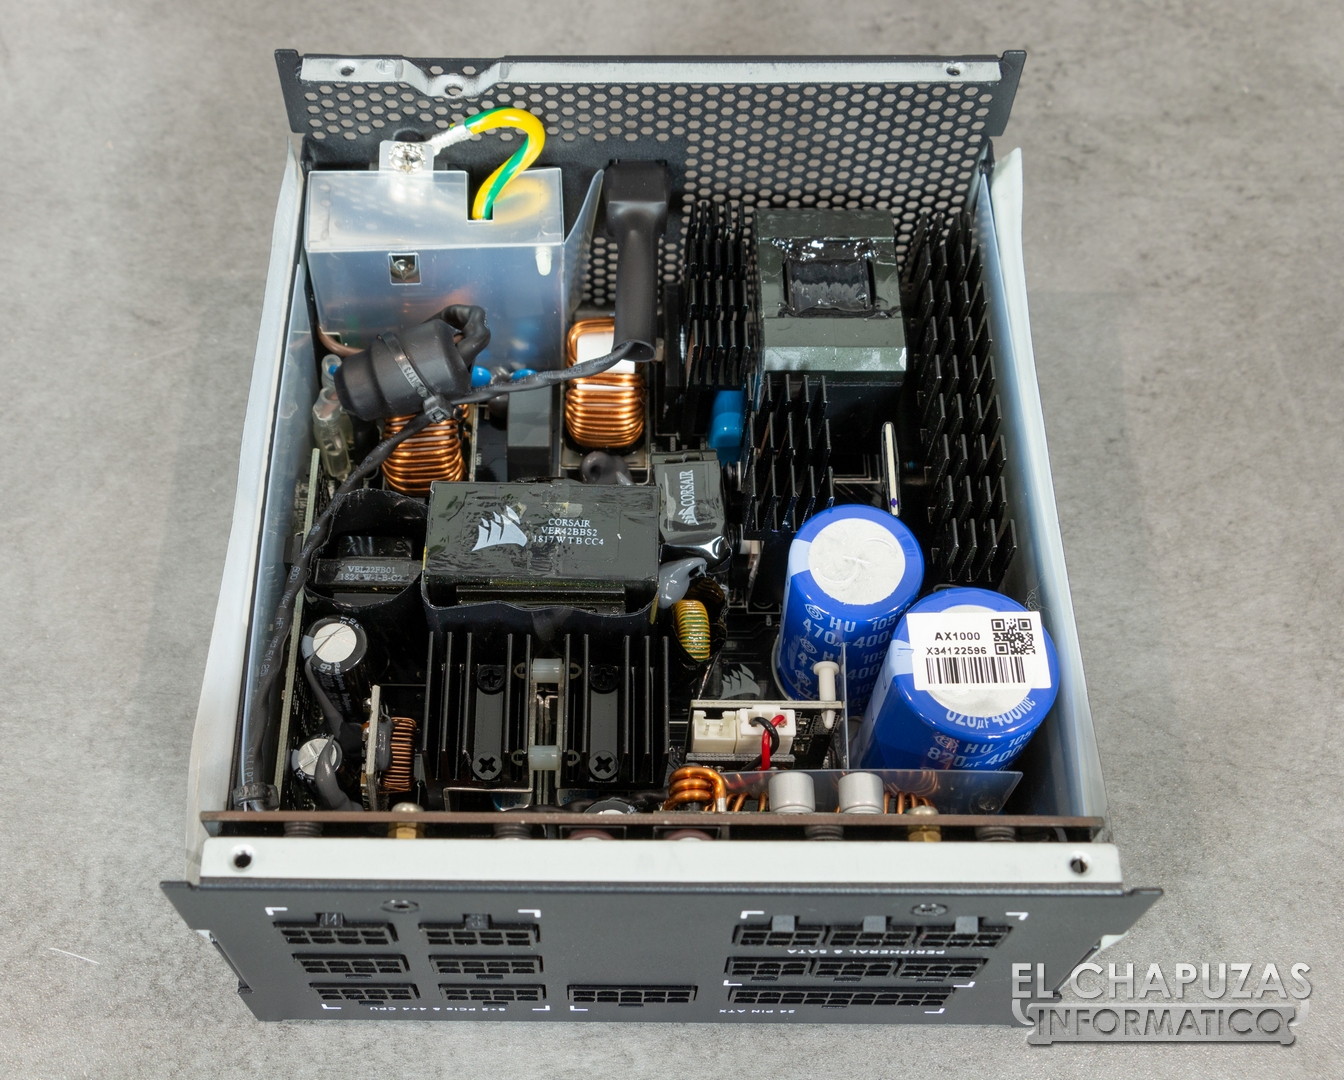 Let’s see if this is true and if this is a good product.Figure 1: Corsair HX1000W power supply.As you can see in Figure 1, this power supply uses a big 140 mm ball bearing fan on its bottom and a big mesh on the rear side where traditionally we have an 80 mm fan.
Git may produce an error if the date is not set correctly. On a Raspberry Pi, enter the following to correct this:
where MM is the month, DD is the date, and hh and mm are hours and minutes respectively.
Clone the usbboot tool repository:
libusb must be installed. If you are using Cygwin, please make sure libusb is installed as previously described. On the Raspberry Pi or other Debian-based Linux, enter the following command:
Now build and install the usbboot tool:
Run the usbboot tool and it will wait for a connection:
Now plug the host machine into the Compute Module IO board USB slave port (J15) and power the CMIO board on. The rpiboot tool will discover the Compute Module and send boot code to allow access to the eMMC.
Writing to the eMMC - Windows
After rpiboot completes, a new USB mass storage drive will appear in Windows. We recommend following this guide and using Win32DiskImager to write images to the drive, rather than trying to use /dev/sda etc. from Cygwin.
Once you have written an OS image, make sure J4 (USB SLAVE BOOT ENABLE) is set to the disabled position and/or nothing is plugged into the USB slave port. Power cycling the IO board should result in the Compute Module booting the OS image from eMMC.
Writing to the eMMC - Linux
After rpiboot completes, you will see a new device appear; this is commonly /dev/sda on a Pi but it could be another location such as /dev/sdb, so check in /dev/ or run lsblk before running rpiboot so you can see what changes.
You now need to write a raw OS image (such as Raspbian) to the device. Note the following command may take some time to complete, depending on the size of the image: (Change /dev/sdX to the appropriate device.)
Once the image has been written, unplug and re-plug the USB; you should see two partitions appear (for Raspbian) in /dev. In total, you should see something similar to this:
The /dev/sdX1 and /dev/sdX2 partitions can now be mounted normally.
Make sure J4 (USB SLAVE BOOT ENABLE) is set to the disabled position and/or nothing is plugged into the USB slave port. Power cycling the IO board should now result in the Compute Module booting from eMMC.
Troubleshooting
For a small percentage of Raspberry Pi Compute Module 3s, booting problems have been reported. We have traced these back to the method used to create the FAT32 partition; we believe the problem is due to a difference in timing between the BCM2835/6/7 and the newer eMMC devices. The following method of creating the partition is a reliable solution in our hands.
- 1Summary
- 2Hardware Revision
- 3Resources
- 4Release
Introduction
The Banana Pi R2 is a router based development board, which can run on a variety of open source operating systems including OpenWrt, Android, and Linux. It has 4 Gigabit LAN ports, 1 Gigabit WAN, and 300Mbs wireless N capabilities.
Key Features
- MediaTek MT7623N, Quad-core ARM Cortex-A7
- Mali 450 MP4 GPU
- 2G DDR3 SDRAM
- Mini PCIE interface.
- support 2 SATA interface
- MicroSD slot supports up to 256GB expansion
- 8G eMMC flash (option 16/32/64G)
- MIPI display interface support
- 5 port 10/100/1000 Mb Ethernet port
- (2) USB 3.0 and (1) USB 2.0 otg port
- 1080P high-definition video playback
- HDMI port and multi-channel audio output
- WIFI&Bluetooth 4.1 with 802.11B/G/N onboard
Getting Start
Hardware interface
Hardware spec
| Banana Pi R2 | |
|---|---|
| CPU | MediaTek MT7623N, Quad-core ARM Cortex-A7 |
| GPU | Mali 450 MP4 GPU |
| Memory | 2G DDR3 SDRAM |
| Storage | Onboard 8GB eMMC Flash, Micro SD-Card slot, Two SATA 2.0 Port |
| Network | 5 x 10/100/1000 Mbit/s Ethernet (MT7530) |
| WIFI&BT | Wi-Fi 802.11 b/g/n 2.4G/5G + Bluetooth BT4.1(MT6625L) |
| Display(s) | HDMI (Type A) output with HDCP 1.4, resolutions up 1920x1200; MIPI Display Serial Interface (DSI) interface(4 data lanes) |
| Video decoder(s) | Multi-format FHD video decoding, including Mpeg1/2, Mpeg4, H.263, H.264, etc. H.264 high-profile 1080p@60fps, HEVC/H.265 1080P@60fps |
| Audio Output(s) | HDMI & I2S |
| USB port | USB 3.0 PORT (x2), USB OTG (x1) |
| mini PCIE | 1 mini pcie interface & 1 pcie pin define interface |
| Remote | IR Receiver (x1) |
| GPIO | 40 Pin Header : GPIO (x28) and Power (+5V, +3.3V and GND). Some of I/O Pin can be used for specific functions as UART, I2C, SPI or PWM |
| Switches | Reset button, Power button, U-boot button |
| LED | Power Status and 8P8C |
| Power Source | 5 volt @2A via DC Power and/or Micro USB (OTG) |
| Size & Weight | 148 mm × 100.5mm 100g |
| OS | OpenWRT, Debian, Ubuntu, Raspbian and others OS |
BPI-MT7615 802.11 ac wifi 4x4 dual-band
we have design a MT7615 802.11 ac wifi module ,can use on BPI-R2
MT7615 is a highly integrated Wi-Fi single chip which support 1733 Mbps PHY rate,It fully compies with IEEE 802.11ac and IEEE802.11 a/b/n standards,offering feature-rich wireless connecivity at high standards,and delivering reliable,cost-effective throughput from and extended distance.
BPI-R2 GPIO Pin define
Banana Pi BPI-R2 40-pin GPIO define:
Banana Pi BPI-R2 has a 40-pin GPIO header that matches that of the Model Raspberry Pi 3. Following is the Banana Pi GPIO Pinout:
BPI-R2 40 PIN GPIO define:
| 40 PIN GPIO of Banana pi BPI-R2 | |||
| GPIO Pin Name | Default Function | ||
| CON1-P01 | VCC-3V3 | ||
| CON1-P02 | VCC-5V | ||
| CON1-P03 | I2C_SDA0 | GPIO75 | |
| CON1-P04 | VCC-5V | ||
| CON1-P05 | I2C_SCL0 | GPIO76 | |
| CON1-P06 | GND | ||
| CON1-P07 | PWM-003 | GPIO206 | |
| CON1-P08 | UTXD1 | GPIO80 | |
| CON1-P09 | GND | ||
| CON1-P10 | URXD0 | GPIO81 | |
| CON1-P11 | URXD1 | GPIO80 | |
| CON1-P12 | I2S0_BCK | GPIO74 | |
| CON1-P13 | UTXD0 | GPIO79 | |
| CON1-P14 | GND | ||
| CON1-P15 | PWM-002 | GPIO205 | |
| CON1-P16 | URTS1 | GPIO25 | |
| CON1-P17 | VCC-3V3 | ||
| CON1-P18 | UCTS1 | GPIO24 | |
| CON1-P19 | SPI0_MO | GPIO56 | |
| CON1-P20 | GND | ||
| CON1-P21 | SPI0_MI | GPIO55 | |
| CON1-P22 | PCM_CLK | GPIO18 | |
| CON1-P23 | SPI0_CK | GPIO54 | |
| CON1-P24 | SPI0_CSN | GPIO53 | |
| CON1-P25 | GND | ||
| CON1-P26 | PCM_RX | GPIO20 | |
| CON1-P27 | I2C_SDA1 | GPIO57 | |
| CON1-P28 | I2C_SCL1 | GPIO58 | |
| CON1-P29 | PCM_RST | GPIO22 | |
| CON1-P30 | GND | ||
| CON1-P31 | SPDIF_OUT | GPIO200 | |
| CON1-P32 | PCM_TX | GPIO21 | |
| CON1-P33 | I2S0_MCLK | GPIO126 | |
| CON1-P34 | GND | ||
| CON1-P35 | I2S0_LRCK | GPIO73 | |
| CON1-P36 | PCM_SYNC | GPIO19 | |
| CON1-P37 | SPDIF_IN1 | GPIO202 | |
| CON1-P38 | I2S0_DATA_IN | GPIO72 | |
| CON1-P39 | GND | ||
| CON1-P40 | I2S0_DATA_OUT | GPI049 | |
MIPI DSI (Display SerialInterface)
Thedisplay Connector is a 40-pin FPC connector which can connect external LCD panel (MIPI DSI) and touch screen (I2C) module as well. The pin definitions of this connector are shown as below. This is marked on the Banana Pi board as“DSI”.
| MIPI DSI of Banana pi BPI-R2 | |||
| DSI Pin Name | Default Function | Function2:GPIO | |
| CN6-P01 | VCC-3V3 | ||
| CN6-P02 | VCC-5V | ||
| CN6-P03 | VCC-3V3 | ||
| CN6-P04 | VCC-5V | ||
| CN6-P05 | GND | ||
| CN6-P06 | VCC-5V | ||
| CN6-P07 | GND | ||
| CN6-P08 | VCC-5V | ||
| CN6-P09 | NC | ||
| CN6-P10 | GND | ||
| CN6-P11 | NC | ||
| CN6-P12 | DSI-D0N | ||
| CN6-P13 | NC | ||
| CN6-P14 | DSI-D0P | ||
| CN6-P15 | DSI_TE | GPIO84 | |
| CN6-P16 | GND | ||
| CN6-P17 | I2C_SDA2 | GPIO77 | |
| CN6-P18 | DSI-D1N | ||
| CN6-P19 | I2C_SCL2 | GPIO78 | |
| CN6-P20 | DSI-D1P | ||
| CN6-P21 | CTP-INT | GPIO23 | |
| CN6-P22 | GND | ||
| CN6-P23 | CTP-RST | GPIO236 | |
| CN6-P24 | DSI-CKN | ||
| CN6-P25 | GND | ||
| CN6-P26 | DSI-CKP | ||
| CN6-P27 | GPIO28 | ||
| CN6-P28 | GND | ||
| CN6-P29 | GPIO83 | ||
| CN6-P30 | DSI-D2N | ||
| CN6-P31 | GPIO204 | ||
| CN6-P32 | DSI-D2P | ||
| CN6-P33 | GND | ||
| CN6-P34 | GND | ||
| CN6-P35 | LCM_BLPWM | GPIO203 | |
| CN6-P36 | DSI-D3N | ||
| CN6-P37 | GND | ||
| CN6-P38 | DSI-D3P | ||
| CN6-P39 | NC | ||
| CN6-P40 | GND | ||
UART specification:
Theheader CON4 is the UART interface. For developers of Banana Pi, this is an easy way to get the UART console output to check the system status and log message.
| Debug Uart of Banana pi BPI-R2 | |||
| CON2 Pin Name | Default Function | GPIO | |
| CON2 P03 | UTXD2 | ||
| CON2P02 | URXD2 | ||
| CON2P01 | GND | ||
Source code
- OpenWRT 18.06 source code on Github: https://github.com/BPI-SINOVOIP/BPI-R2-OPENWRT-18.06
- BPI-R2 github BSP : https://github.com/BPI-SINOVOIP/BPI-R2-bsp
- OpenWRT LEDE: https://github.com/garywangcn/bpi-r2_lede/tree/bpi-r2-on-lede-v1
- BPI-R2 linux kernel 4.14 : https://github.com/frank-w/BPI-R2-4.14
- OpenMPTCProuter : https://github.com/Ysurac/openmptcprouter
- BPI-R2 FreeBSD support/ZRouter.org support :https://gist.github.com/rayddteam/3461964e69f1fcc727b1b68ec9d6d0c8
Documents
- BPI-R2 Schematics :BPI-R2 V1.2 hardware schematic diagram
- BPI-R2 Schematics :BPI-R2 V1.1 hardware schematic diagram
- Dimensional diagram BPI-R2 DXF design file
- MTK MT7623N datasheet
- MTK 7623N datasheet for development board programming guide v1.1 new update
- FW-Web Wiki : http://fw-web.de/dokuwiki/doku.php?id=en:bpi-r2:start
- Banana pi BPI-R2 CE,FCC,RoHS:
- CE,FCC,RoHS
- Banana Pi BPI-R2 Razberry board OpenHab2
- https://community.openhab.org/t/banana-pi-bpi-r2-razberry-board-openhab2-help/37222/8
- gitbook online documents: https://bananapi.gitbooks.io/banana-pi-bpi-r2-open-source-smart-router/content/
- The best news is that the final patchset version for HNAT framework was accepted ( kernel 4.16) and it's based on nftables.:https://www.spinics.net/lists/netfilter-devel/msg50973.html
- How to build an Ubuntu/Debian SD image from scratch : http://forum.banana-pi.org/t/how-to-build-an-ubuntu-debian-sd-image-from-scratch/6805
- Best Banana Pi R2 Operating System Options: https://www.electromaker.io/blog/article/best-banana-pi-r2-operating-system-options
- Make a Banana Pi R2 Router: Banana Pi R2 OpenWRT Installation and Review:https://www.electromaker.io/tutorial/blog/make-a-banana-pi-r2-router-banana-pi-r2-openwrt-installation-and-review
- MTK chip mailline Linux effort :https://mtk.bcnfs.org/doku.php?id=linux_mainline_effort
Android 6.0
- baidu cloud : https://pan.baidu.com/s/1pMrroy3
- discuss on forum : http://forum.banana-pi.org/t/bpi-r2-new-image-release-android-6-0-v1-0/4630
Ubuntu with kernel 4.4
- Source code(BSP): https://github.com/BPI-SINOVOIP/BPI-R2-bsp
- BPI-R2 Ubuntu 16.04 Kernel4.4 V1.3
- Image Release : http://forum.banana-pi.org/t/topic/5293
Ubuntu with kernel 4.14
- Source code(BSP): https://github.com/BPI-SINOVOIP/BPI-R2-bsp-4.14
- Image Release
- BPI-R2 Ubuntu 16.04 Kernel4.14 V1.0: http://forum.banana-pi.org/t/topic/5548
OpenWrt(LEDE)
- Official OpenWR 18.06.4 for Banana Pi BPI-R2 image released 2019-7-04
- image download:https://downloads.openwrt.org/releases/18.06.4/targets/mediatek/mt7623/
- Forum pthread:http://forum.banana-pi.org/t/official-openwr-18-06-4-for-banana-pi-bpi-r2-image-released-2019-7-04/9459
- BananaPI BPI-R2 Openwrt18.06 Image Release and source code 2019-03-06
- source code on Github: https://github.com/BPI-SINOVOIP/BPI-R2-OPENWRT-18.06
- image download: https://dev.banana-pi.org.cn/Image/BPI-R2/Openwrt/1806/
- MD5SUM
- mtk-bpi-r2-EMMC.img : 5d1537c45679de352dd25d8dda46b9ad
- mtk-bpi-r2-SD.img :71fce303abdceed4f1c3548d5a3fc207
- forum Pthread: http://forum.banana-pi.org/t/bananapi-bpi-r2-openwrt18-06-demo-image-release-2019-03-06/8562
- Official OpenWRT 18.06.0 image :
- https://downloads.openwrt.org/releases/18.06.0/targets/mediatek/mt7623/
- Source code: https://github.com/garywangcn/bpi-r2_lede/tree/bpi-r2-on-lede-v1
- Image Release
- BPI-R2 OpenWrt(LEDE) 20180509: http://forum.banana-pi.org/t/topic/5646
- BPI-R2 OpenWrt(LEDE) 20180411: http://forum.banana-pi.org/t/topic/5395
- BPI-R2 OpenWrt(LEDE) 20170908: http://forum.banana-pi.org/t/topic/3797
OpenMPTCProuter
- 2018-10-12 update, OpenMPTCProuter use MultiPath TCP (MPTCP) to aggregate multiple Internet connections and OpenWrt. and have official support BPI-R2.
- image download:https://www.openmptcprouter.com/download
- source code on github:https://github.com/Ysurac/openmptcprouter
- forum pthread: http://forum.banana-pi.org/t/banana-pi-bpi-r2-new-image-openmptcprouter-official-support/7229
Armbian
- Armbian preview image for Bananapi R2 / K4.19.y
- https://www.armbian.com/bananapi-r2/
Centos 7
- Source code(BSP): https://github.com/BPI-SINOVOIP/BPI-R2-bsp
- Image Release
- BPI-R2 Centos 7 Kernel4.4 20180112: http://forum.banana-pi.org/t/topic/5124
- how to install: https://www.electromaker.io/tutorial/blog/getting-started-with-centos-on-the-banana-pi-r2-how-to-install-centos-on-banana-pi-r2
Debian
- 2019-8-12 update.[BPI-R2] debian 10 buster image with Kernel 4.19.62, shared by frank-w
- Kernel: 4.19.62,uboot 2019-07 with erase-env + sata-support,new preloader (2019-07-22),configured to ip 192.168.0.11 on lan0,openssh-server running with root-login (should be disabled afterwards),username/password: root/bananapi
- google drive:https://drive.google.com/open?id=1oP7jy1KrrIOifvImo2nQ59wx3_9hHkgk
- how to : https://www.fw-web.de/dokuwiki/doku.php?id=en:bpi-r2:storage#short_install-guide
- forum discuss:http://forum.banana-pi.org/t/bpi-r2-debian-buster-image-with-kernel-4-19-62/9601
- Image Release
- image download : https://drive.google.com/drive/folders/1oP7jy1KrrIOifvImo2nQ59wx3_9hHkgk
- documents: http://www.fw-web.de/dokuwiki/doku.php?id=en:bpi-r2:debian
Basic Alpine Router Platform with WIFI AccessPoint on Pantavisor 005
- Image Release
- release date :2018-06-17
- SD-Card images:
- 512M: https://s3.amazonaws.com/bpi-pv/alpine-router/2/2018-06-16-alpine-router-pantavisor-512M-bpi-r2-sd-emmc.img.zip
- 8G: https://s3.amazonaws.com/bpi-pv/alpine-router/2/2018-06-16-alpine-router-pantavisor-8G-bpi-r2-sd-emmc.img.zip
- PVR Command Line Tool (download to PATH directory and make executable):
- Linux (amd64): https://gitlab.com/pantacor/pvr/uploads/b0db2e9e36fa70ff09e045df9c9803d4/pvr-004-amd64.gz
- Windows (x64): https://gitlab.com/pantacor/pvr/uploads/a7a26b603a5b8e9a98e2dc7c77b4c252/pvr-004-win10-x64.zip
- More downloads: https://gitlab.com/pantacor/pvr/tags/004
- Discuss on forum :
- http://forum.banana-pi.org/t/bpi-r2-new-image-basic-alpine-router-platform-with-wifi-accesspoint-on-pantavisor-005-2018-06-17/6032
yocto Linux
- this image just for test. yocto with kernel 4 4,and GPU working fine.this GPU binary is from yocto SDK with kernel 3.18 , we test it with github kernel 4.4 , just change rootfs. if working fine .so , maybe can use on kernel 4.14. just need to test . and have weston commond to test more.
- test image : https://drive.google.com/open?id=1le2rroD3Dgc4HkEUmGyDLZix-Llrzeen
- video demo : https://www.youtube.com/watch?v=HhFn1Nqht1E&feature=youtu.be
- Forum pthread : http://forum.banana-pi.org/t/banana-pi-bpi-r2-new-image-gpu-decode-test-yocto-with-kernel-4-4-just-for-test/6508
MQLinux 19.02 beta
- update 2019-03-12, Note : this image is shared by http://www.morequick.net/. not support by BPI team
- Main features:
- Highly streamlined embedded design system, running in memory
- Mutilple Language (en/zh_CN currently)
- DNS Proxy/Cache
- DDNS
- VLAN Extension for WAN
- Multiple WAN (each ethernet port can be defined)
- DHCP Server
- FTP Server
- PPPoE Server
- Samber Server
- VPN client/Server (PPTP VPN, IPsecVPN, OpenVPN)
- Cloud Login
- Firewall
- IP-MAC Locking
- Port Mapping/DMZ/UPnP
- Diagnose Tools …
- image dwonload: https://drive.google.com/file/d/1Ws2IUiCGSKKQ2dCM5XJBV-pog-hk17PM/view?usp=sharing
- MD5: 09b58f050166ed5d09803e1de56d7890
- Forum pthread: http://forum.banana-pi.org/t/banana-pi-bpi-r2-new-image-mqlinux-19-02-beta/8832
- Main features:
FreeBSD
- BPI-R2 FreeBSD support/ZRouter.org support
- http://forum.banana-pi.org/t/bpi-r2-freebsd-support-zrouter-org-support/7290
- BPI-R2 based DIY NAS/Router : https://bburky.com/NAS/
- Forum pthread:http://forum.banana-pi.org/t/bpi-r2-based-diy-nas-router/6787